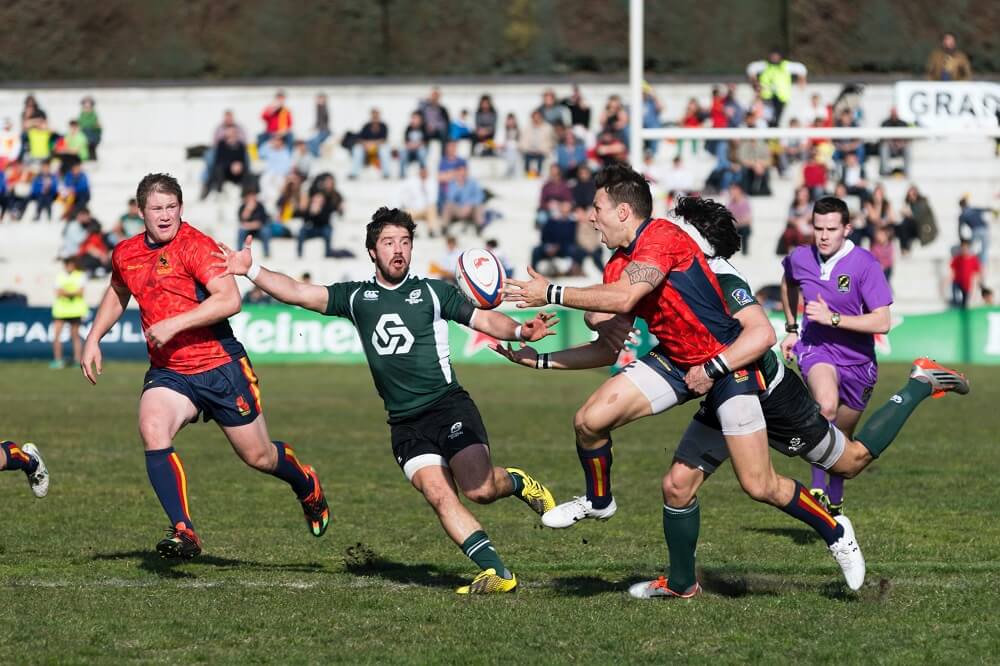


Photo by Quino Al
If you’ve got a passion for sport and a taste for challenge, sports photography has it all. There’s nothing like capturing the moment that defines a match, seals a victory or breaks a world record.
But to do that you need speed, the right setup, and a solid understanding of the sport and your camera gear.
Level up your sports action photography with these essential tips on gear, technique, and key sports photography settings.


Photo by Braden Collum
1. Choose the Right Gear
What makes the best camera for sports photography? In a word, speed. Opt for a camera that offers manual settings, high burst speeds, solid buffer performance and fast, accurate autofocus.
The speed of your memory card is just as important. Invest in cards with 95MB/s or higher read speeds to get the most out of your camera’s performance.
To get close to the action you’ll typically need a telephoto lens with a focal length of at least 200mm (equivalent). Even longer works best for field sports – think 400mm for sports like rugby, soccer and hockey, and 600mm for the likes of AFL and cricket. Fast aperture lenses (f4 or wider) are ideal as they work better with fast shutter speeds and low lighting, and soften backgrounds more to make subjects stand out.
Always check what you can and can’t shoot, or use, at sports events. Major venues tend to limit the size of camera lenses that spectators can use (often to 200mm maximum).
If that’s the case, it’s worth considering a teleconverter to increase your focal range. Just be aware that this will reduce your lens’ effective maximum aperture, and could also affect focusing speed.
For wider shots and occasions or sports where there’s less distance involved (e.g. basketball), a standard focal length lens—ideally a 24-70mm (equivalent) f2.8—is a good option.
While not essential, a wide angle lens (16-35mm equivalent) can be handy for capturing context—such as the size of a stadium—or group photos.
Pro Tip: It’s common for professional sports photographers to carry more than one camera so they can quickly use different lenses if needed.
For more advice on choosing gear, check out our sports photography buying guide.


Photo by Jesse Orrico
2. Plan Ahead
Scope out the arena well in advance. Think about where the light will be, and look for good vantage points that’ll give your shots clean backgrounds.
Try to keep subjects in front of and the light behind you. This will make it easier to get better exposures and a clear view of people’s faces.
Pro Tip: In most cases you’ll be too far from what’s happening for your flash to be useful. More importantly, your flash may distract or startle the athletes, so turn it off, just to be safe.


Photo by Jackson Seebohm
3. Freeze the Action
The faster the action, the faster a shutter speed you’ll need to freeze it blur-free. Most sports call for a minimum shutter speed of 1/1000 seconds, which means you’ll need to shoot in Shutter Priority (TV) or Manual (M) mode.
If you’re in Manual mode, opt for a wide aperture (f2.8-4). Variable (auto) ISO may be helpful, particularly if there are passing clouds. If your sports photography camera doesn’t have auto ISO, try around ISO 400 in sunny conditions, ISO 1000 when it’s overcast or ISO 1600 indoors.
Pro Tip: Spot metering exposure mode usually provides more accurate exposures. It gives you the best chance of exposing for the subject rather than any background highlights.


Photo by toine G
4. Emphasise Speed
While some subjects look best sharply frozen, a bit of background blur can make others—especially in motorsports—look more dynamic.
The way to achieve this is panning, i.e. rotating your camera horizontally to follow a subject moving across frame. (A monopod is handy here for keeping your camera steady.) For best results, lower your shutter speed (to around 1/125-250 sec for race cars, 1/15 sec for athletes, or 1/8 sec for kids) and start tracking your subject as it comes into view. Then press the shutter once your subject gets to where you want to photograph it.
Once you’ve got the hang of panning, try reducing or increasing your shutter speed to show more or less motion. Ideally you should end up with sharp detail in your subject, and enough blur in the background to create the impression of speed.


Photo by Jeffrey F Lin
5. Stay on Target
To keep up with moving subjects, set your autofocus (AF) mode to Continuous (AI Servo, AF-C, or C-AF). This way, your sports photography camera will continuously track your chosen subject, ensuring it’s sharp when you take the shot.
Pro Tip: Instead of half-pressing the shutter to focus (which can lead to accidental misfires), try back button focusing. This more efficient method allows you to recompose, or shoot in fast bursts, without your camera needing to refocus.


Photo by Rocco Caruso
6. Up Your Frame Rate
Shooting in high-speed continuous or burst mode will give you the best chance of capturing those critical, split-second moments. By holding down the shutter button, you’ll be able to capture multiple successive shots of fast action sequences. Just keep in mind that the more frames per second (fps) you shoot, the more memory you’ll consume.


Photo by Pietro Mattia
7. Get Your Colours Right
Your camera’s auto white balance (WB) mode should work well in most outdoor daylight situations. However, some lighting conditions—such as early morning or artificial light—can confuse your camera, resulting in an overly green or yellow tinge.
To get accurate colours, it’s important to choose the appropriate WB setting for the lighting conditions – whether it’s Fluorescent, Cloudy or even Custom. Before the sports event starts, set whichever one looks best and be prepared to adjust it if lighting conditions change.


Photo by Rachel Barkdoll
8. Focus Attention Where It Matters
Isolating your subject puts attention where it belongs. For best results try capturing a single player or competitor against a clean, undistracting backdrop. Using the best lens for sports photography with a wide aperture (f2.8 or f4) will help make background elements dissolve away.
Pro Tip: Faces make virtually any sports photo more powerful. Including the main subject’s face unobstructed adds personality, emotion and even star quality, in the case of well known athletes.


Photo by Jacek Dylag
9. Fill the Frame (But Not Too Much)
Tight crops often create higher impact, but watch that you don’t overdo it. Things move so fast in sport that it’s easy to unintentionally leave out an athlete’s fingers or feet, which can spoil an otherwise good photo. Give yourself a little breathing room; you can always crop a little tighter in post.


Photo by Max Winkler
10. Keep Ahead of the Game
If you’re just following the action, you’re probably going to miss it. You need to think ahead of the game to be ready when opportunity strikes.
The more you understand the rules and rhythms of the sport you’re capturing, the better you’ll be at sensing the next move, and getting into the right place at the right time.


Photo by Emma Dau
11. Tell the Whole Story
There’s so much more to sport than the competition itself. Everything, from a nail-biting coach to a Mexican waving crowd, helps define the emotion and atmosphere of any event. So don’t just limit yourself to the highlights. Look for photo opportunities before, during and after the game or race, both on and off field.


Photo by Steven Lelham
12. Do the Unexpected
The shots that truly stand out are rarely the obvious ones – i.e. the ones that every other sports photographer or fan will capture. Changing your angle, adopting a rarely seen viewpoint, or capturing unexpected details can give your images a valuable point of difference.
Want more advice on action or sports photography?
Just ask one of our experts.
